A while ago I was interested in performing some HTTPS MITM analysis on an Android app, without having to rely on a real device but instead using an Android Virtual Device, or in other words: an emulated device. It turns out that this is surprisingly tricky with a lot of gotcha’s, but in the end I managed to get it to work:
Got it to work… #certpinning #android #hacking #makesuretoremembertowritethisdownsoon pic.twitter.com/i163GAqkQ1
— Seppe vanden Broucke (@Macuyiko) November 27, 2017
Here are the steps you need to follow if you want to do this yourself.
First, get your MITM proxy tool up and running. I’m using Fiddler here, but any MITM tool which comes with an HTTPS root cert should work.
I assume Android Studio is installed. Create a new AVD device (Tools -> Android -> AVD Manager) with Android 7.1.1 as the target (API level 25) and CPU architecture x86. Newer API levels might also work, but I haven’t tested this. Older API levels might work with different, older tools, but don’t offer support for the app I was planning to analyze, so 7.1.1 is a solid middle ground.
Open a console window in C:\Users\<USERNAME>\AppData\Local\Android\sdk\platform-tools\ or the corresponding installation directory on your system (it should contain an adb.exe). Start the emulator using:
..\emulator\emulator.exe -avd Pixel_API_25 -writable-system
Note down the local IP address of your computer, and use it to set the proxy address in Android’s WiFi or cellular settings accordingly (your IP address might vary):
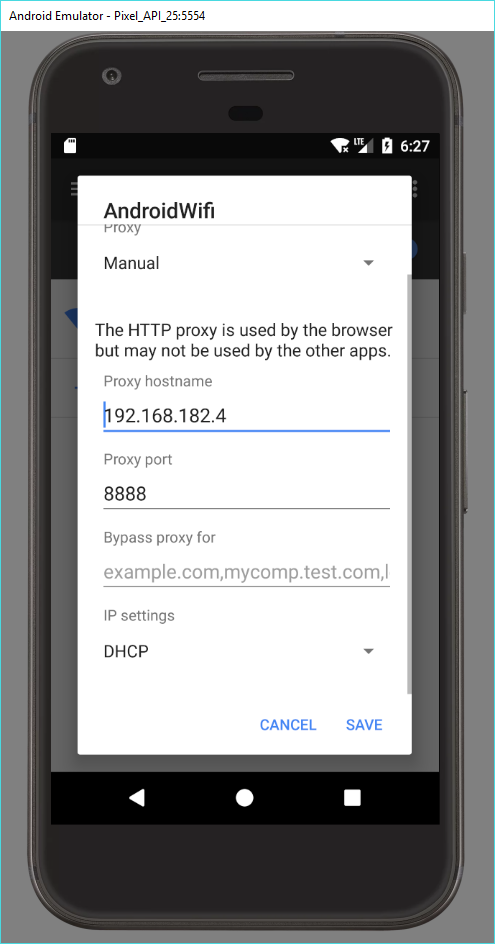
(Note: the emulator settings themselves also offer a way to set the proxy for the emulator, but I like to do it in Android itself as this allows me to switch between a proxied connection (WiFi) and non-proxied (cellular) without too much hassle.)
Open Chrome on the Android device and navigate to the same address, e.g. 192.168.182.4:8888. You will be presented with a Fiddler Echo Service page offering to download the FiddlerRoot Certificate. Do so, and add it to the Android credential store. You’ll be required to set a PIN code.
Once this is done, open a second console window in C:\Users\<USERNAME>\AppData\Local\Android\sdk\platform-tools\. We’re going to transfer the apps we need using adb. Put the following APK’s in \platform-tools\ (or somewhere else if you prefer to keep things neat):
- app.apk: the application you want to analyze
- SuperSU, which you can obtain from http://www.supersu.com/download, I’m using
eu.chainfire.supersu_v2.82-282_Android-2.3.apk. Also download the latest “Recovery Flashable.zip” from there and extract thex86folder as well (e.g. so you have aC:\Users\<USERNAME>\AppData\Local\Android\sdk\platform-tools\x86\su.pie) - The Xposed framework: the installer can be downloaded from this page, but note that for Android 5.0 or higher, you need to rely on the versions posted over at https://forum.xda-developers.com/showthread.php?t=3034811, so go there and obtain
XposedInstaller_3.1.4.apk - JustTrustMe: obtain from https://github.com/Fuzion24/JustTrustMe/releases
Note that there’s also TrustKiller, though this works through Cydia Substrate, which offers similar functionality as Xposed but is outdated and not maintained any longer, so we’re not using these here. There’s also this, but this didn’t work quite well in my setup.
Once you have all the files downloaded, install them:
.\adb install app.apk
.\adb install eu.chainfire.supersu_v2.82-282_Android-2.3.apk
.\adb install XposedInstaller_3.1.4.apk
.\adb install JustTrustMe.apk
Then run:
.\adb root
.\adb shell setenforce 0
.\adb remount
.\adb push .\x86\su.pie /system/bin/su
.\adb push .\x86\su.pie /system/xbin/su
.\adb shell chmod 0755 /system/bin/su
.\adb shell chmod 0755 /system/xbin/su
.\adb shell su --install
.\adb shell "su --daemon&"
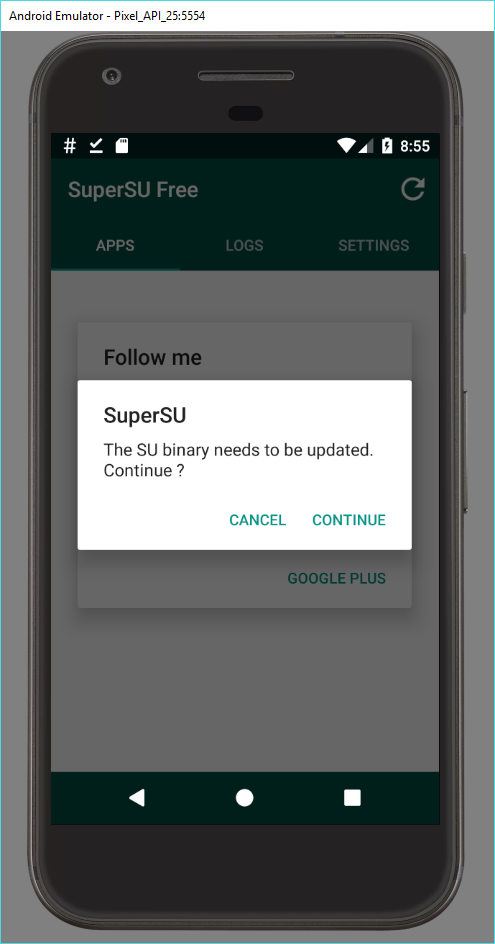
Now switch back to the emulator. First open the SuperSU app. SuperSU will complain about the SU binary which needs to be updated, but press “CANCEL” instead of “CONTINUE”! Otherwise, you risk ending up stuck in boot.
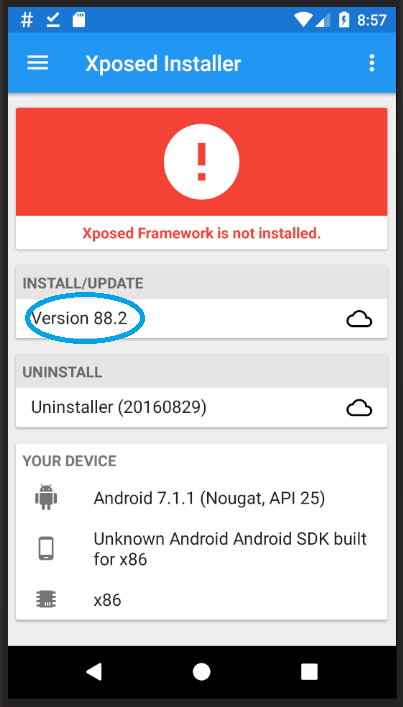
Next, open the Xposed Installer app. Press “INSTALL/UPDATE” here and “Install” (not “Install via recovery”!):
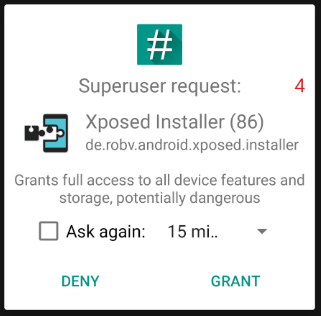
Press “GRANT” when asked by SuperSU:
Your device will automatically reboot. Booting might take a few minutes, but should work. Each time you reboot the device, execute the following commands again:
.\adb root
.\adb shell setenforce 0
.\adb remount
.\adb push .\x86\su.pie /system/bin/su
.\adb push .\x86\su.pie /system/xbin/su
.\adb shell chmod 0755 /system/bin/su
.\adb shell chmod 0755 /system/xbin/su
.\adb shell su --install
.\adb shell "su --daemon&"
(Note: in case you’d need to restart the emulator altogether, don’t forget to start the emulator.exe with the writable-system flag.)
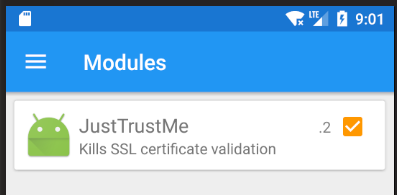
Try navigating to a page in Chrome to verify your Fiddler setup is still working. Once you’ve verified the MITM is working in the browser, you can install the cert pinning remover. Open Xposed Installer again. It should now indicate that the framework is active. In the menu, pick “Modules” and activate JustTrustMe.
You’ll have to reboot again for the changes to become active. To avoid having to execute the commands above again, pick “soft reboot” from Xposed’s menu.
That’s it, you should now be able to capture HTTPS requests from the app. Well, sort of… cert pinning circumvention is getting harder and harder, and especially Facebook is trying damn hard to prevent the practice (by shipping native libs with cert pinning included therein instead of in Java .class’es, making the hooking approach as done by JustTrustMe insufficient). In my particular setting, the app to be analyzed first required users to login with Facebook. As such, I first had to disable JustTrustMe in Xposed, login to Facebook using the non-proxied cellular connection, activate JustTrustMe again, soft reboot, switch back to the proxied WiFi, and then use the app (which luckily was happy to use the local Facebook token in its own less secure API requests, where JustTrustMe was able to do the job and reveal the requests).
Things are getting harder to circumvent. After spending some time recently to try to extract 3d objects from the web version of Google Earth, it seems that the web too might soon have various ways to prevent scraping altogether. Imagine rendering a normal website through WebGL where content is streamed in dynamically using on-the-fly constructed protobuf messages returning shader fragments… yikes.